What are Virtual Machines?
Virtual Machines (VMs) essentially package a whole computer as an app that can be run.
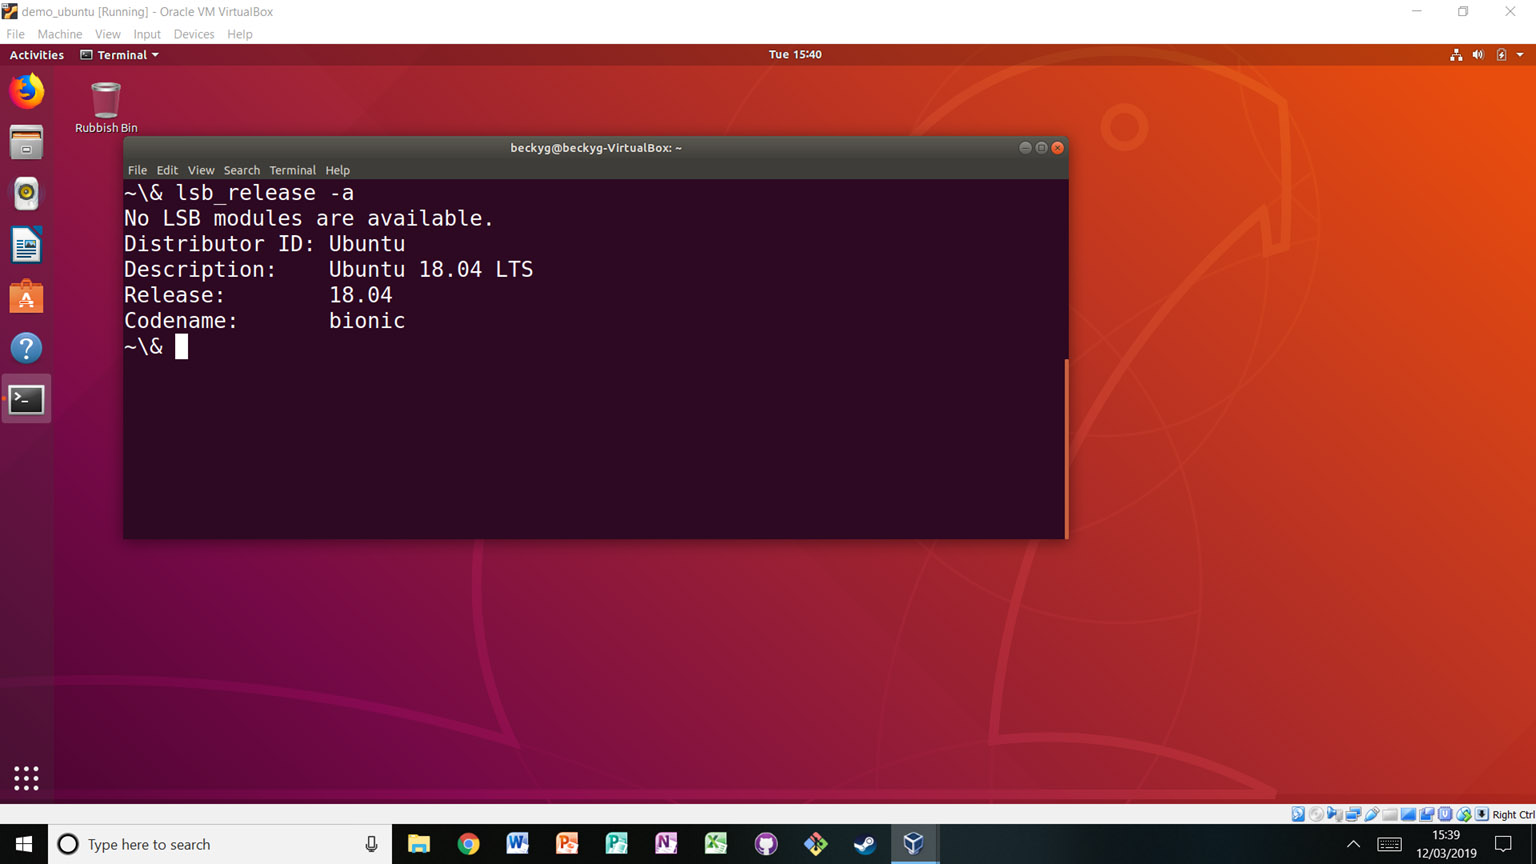
As an example, the figure below shows a windows laptop (note the windows search button in the lower-left corner) running a virtual ubuntu machine (note the terminal outputting the operating system).
The machine running the VM is called the host machine.
Using software like VirtualBox or Vagrant, a user can create and run any number of VMs. As you could probably guess, having several VMs running at once can be a drain on memory. So just because you can run several VMs does not mean you should.
Users can download, install, backup and destroy VMs at will, which is why they are an attractive tool for sharing reproducible research. Research often requires specific pieces of software or system settings. If a researcher wishes to reproduce another’s work on their computer, making the necessary changes to their environment to run the project may impact their work. For example, in the Motivation and Background section of this chapter, we described how using a different version of Python can lead to unexpected changes in the results of an analysis. Say a researcher installs an updated version of Python to replicate an analysis because the analysis requires features only present in the updated version. By doing so, they put their own work at risk. VMs remove that risk; any tools downloaded or settings changed will only impact the VM, keeping the reproducer’s research safe. If they do inadvertently break something in the VM, they can delete it and make another one. VMs are effectively a quarantined area.
Using Virtual Machines for Reproducible Research
Virtual machines can be shared by exporting them as single files. Another researcher can then import that file using their own virtualisation software like VirtualBox and open up a copy of the VM which will contain all the software files and settings put in place by the person that made the VM. Therefore in practice, they will have a working version of the project without the pain of setting it up themselves.
Setting up a Virtual Machine
First, choose a tool for generating VMs.
Here the widely-used VirtualBox is chosen.
Download and install it on your system.
To create a new machine, click “New” in the top left.
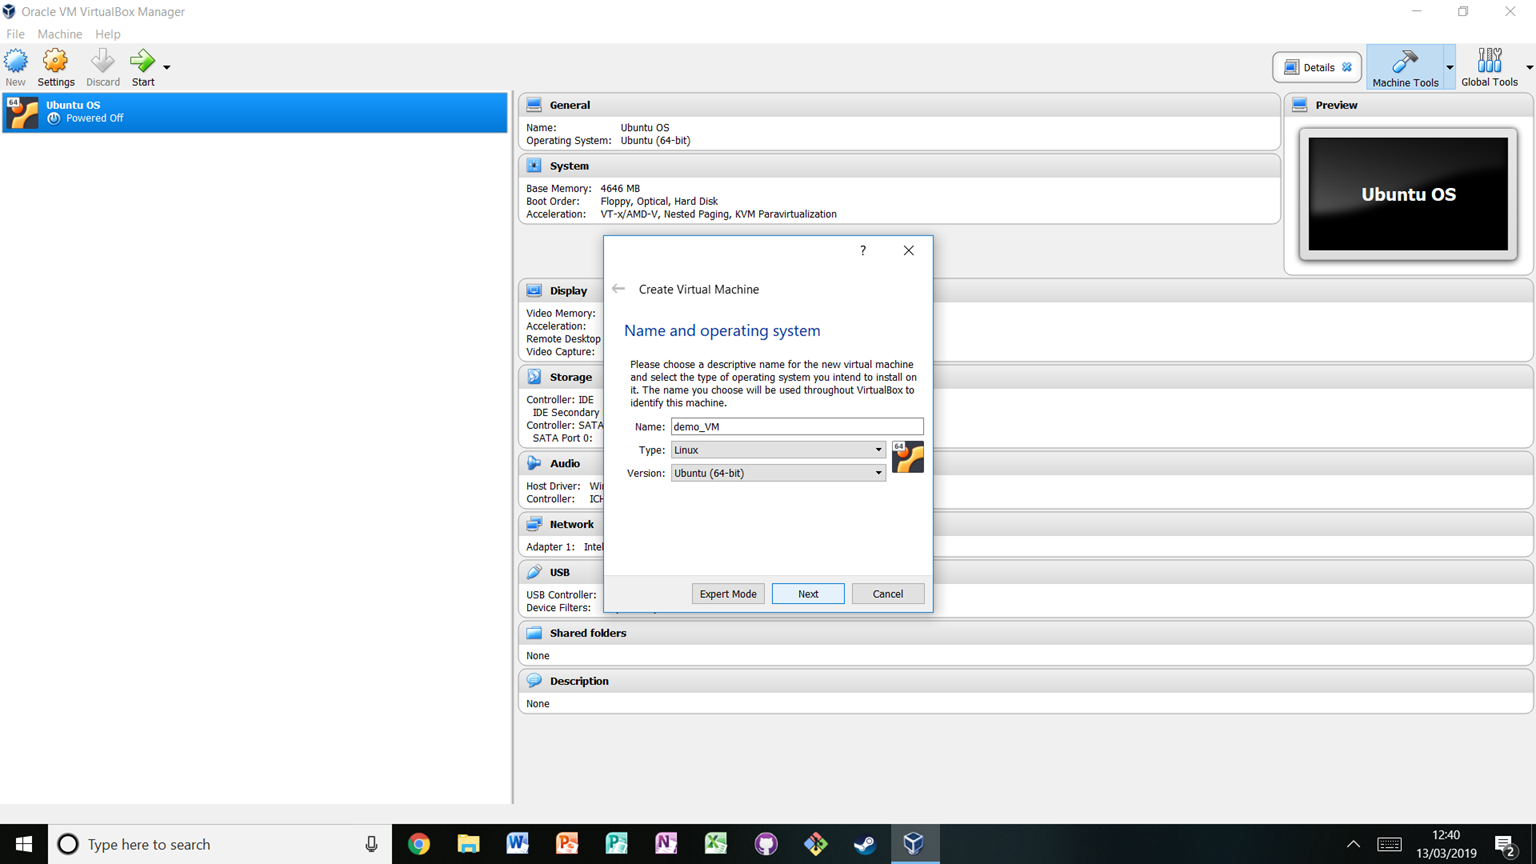
A window will pop up where you can enter a name for the machine and select what operating system (and version) to use.
In the figure below, a machine called demo_VM running Ubuntu is being created:
As you click through, you can adjust other features of the machine to be created, such as how much memory it should have access to. The default options are suitable for most purposes, but this process permits customisation.
Starting a Virtual Machine
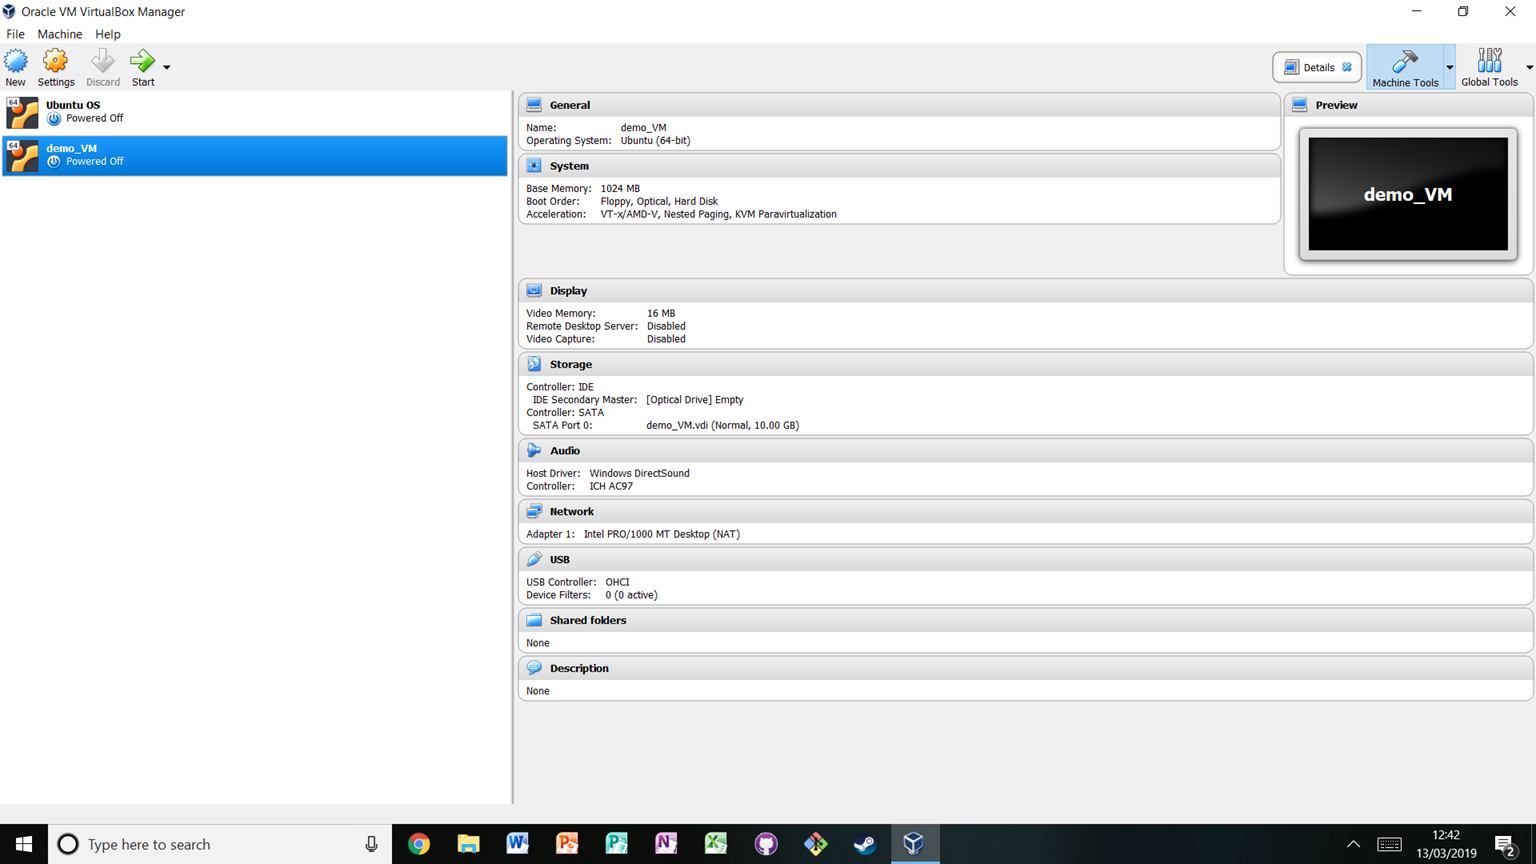
To start a virtual machine, select the machine from the list of VMs on the left, and click the green Start arrow at the top:
Sharing Virtual Machines
A researcher can do work on their VM, and then export it.
To export a VM, click File in the top left and then Export.
This will export the VM as a single file which can be shared.

Someone that has access to this file and VirtualBox installed just needs to click File in the top left, then Import to select that file.
Once it is imported, they can start the VM as described before, by selecting it from the menu clicking the green start arrow at the top.
Declarative Virtual Machines with Vagrant
Vagrant is a tool which “enables users to create and configure lightweight, reproducible, and portable development environments”. In this context, an environment is a virtual machine (its CPUs, RAM, networking and so on) and the machines state (operating system, packages). Vagrant can set up virtual machines using text scripts, instead of pointing and clicking through a graphical user interface. This makes it particularly useful for automating the process of setting up virtual machines and making that process reproducible.
How Vagrant Works
Unlike some other tools you may use to create or manage virtual machines, like VirtualBox and QEMU, Vagrant does not have its own hypervisor. Instead, Vagrant uses providers to interact with other virtualisation tools. Vagrant has built in providers for VirtualBox, Hyper-V and Docker. Other providers can be supported by plugins. In particular, the Vagrant developers maintain an official plugin for VMWare. For Linux users there is also a community supported provider for libvirt.
Vagrant environments can be packed into boxes. When using Vagrant you will most likely start from an existing box and build your environment on top of it. You can browse and search for public boxes here.
After deploying a box, Vagrant can also use provisioners to apply further configuration. This is useful to adapt a generic box to a specific purpose, for example by installing packages. Provisioning can be as simple as a shell script but can also incorporate powerful configuration management tools like Ansible, Puppet and Chef.
The Vagrantfile
With Vagrant, users can define the configuration of a virtual machine (or group of virtual machines) in a declarative configuration language stored in a Vagrantfile. This configuration is written in the Ruby programming language. However, it is not necessary to know Ruby as the syntax is simple and the documentation explains all of the available options.
Defining the virtual machines in plain text has a number of advantages over distributing full virtual machine images:
- The files can be checked into version control
- Small size makes them fast and easy to share
- Users can reproducibly build environments
- A single definition can potentially work across multiple hypervisors (like VirtualBox, VMWare, libvirt)
In combination these qualities support Vagrant’s goals of lightweight, portable and reproducible environments. A project can maintain its development environment alongside the source code and every contributor can use the environment with minimal barriers.
The Vagrant CLI
You will most likely use vagrant through the command line interface (CLI). The CLI can be used to:
- manage machines with commands like
vagrant up,vagrant haltandvagrant destroy - connect to machines with
vagrant sshandvagrant powershell - get, package and publish boxes
- create minimal a Vagrantfile with
vagrant init
Full documentation for all commands can be found here.
Syncing Data
Vagrant can help sharing data between the host and the virtual machine by syncing directories.
By default, the directory containing the Vagrantfile is mounted at /vagrant on the guest.
Therefore, if you keep a Vagrantfile in the root of a git repository, when you use the Vagrant environment you will find your project at /vagrant.
This makes it convenient to develop, build and test your project within the environment.
Additional shared directories can be declared as explained in the documentation.
A Virtual Machine for The Turing Way
Here we will walk through some important part of a Vagrantfile by designing an environment to build The Turing Way. Building the book this way might help keep your host system clean from build dependencies. It could also help debug problems as multiple people can better ensure they are using the same environment to work on the book.
The Vagrantfile
You can find the full Vagrantfile in the root of The Turing Way git repository. We will then use some of the Vagrant CLI commands to provision the machine and use it to build the book.
The top level block of the Vagrantfile specifies the Vagrant configuration version. This will help maintain backwards compatibility if new versions are released. All other configuration is contained within this block.
Vagrant.configure("2") do |config|
  ...
end
Next the box to build our environment from is specified.
config.vm.box = "generic/fedora36"This is a box for version 36 of the Fedora Workstation Linux distribution. The generic org creates boxes of many Linux distributions for multiple hypervisors. This makes them useful for creating environments which can be run by users on different operating systems.
The virtual machine’s hostname is defined, and The Turing Way project directory is mounted at /vagrant inside the virtual machine.
  config.vm.hostname = 'theturingway'

  config.vm.synced_folder "./", "/vagrant"
The number of virtual CPUs and amount of memory are set in provider specific blocks. In this example two virtual CPUs and 2048MB of RAM are allocated for the VirtualBox and libvirt providers.
Provider specific overrides can also be specified in provider blocks. In this example the synced directory settings are changed for libvirt to improve NFS compatibility. NFS is the default method to sync folders for libvirt.
  config.vm.provider "virtualbox" do |vb|
    vb.cpus = 2
    vb.memory = 2048
  end

  config.vm.provider "libvirt" do |lv, override|
    lv.cpus = 2
    lv.memory = 2048

    override.vm.synced_folder "./", "/vagrant", nfs_udp: false
  end
The shell provisioner is used to install the packages necessary to build the book. First a script is defined to install pip, then use pip to install the python requirements as explained in the book README. The script is then passed to the provisioner.
  $script = <<-'SCRIPT'
  dnf install -y python3-pip
  sudo -u vagrant pip install --no-warn-script-location -r /vagrant/book/website/requirements.txt
  SCRIPT

  config.vm.provision "shell", inline: $script
Building the book
Here we will show how to use The Turing Way Vagrant machine to build the book. First you will need to make sure you have installed Vagrant and a compatible provider. VirtualBox will probably be the easiest provider to use as it is supported on Linux, MacOS and Windows. Windows users can also try Hyper-V, which is included in some editions of Windows 10 and Windows 11.
If you haven’t already, clone The Turing Way repository and change to the projects root directory.
$ git clone https://github.com/the-turing-way/the-turing-way.git
$ cd the-turing-way
Now create the virtual machine.
The output will show Vagrant creating the machine as well as the provisioner script installing the build dependencies.
Windows users can modify this command to vagrant up --provider hyperv to use Hyper-V.
$ vagrant upYou can now connect to the machine with SSH. Vagrant has a convenient wrapper to make this simple.
$ vagrant sshThe project directory has been mounted at /vagrant on the guest.
We can change to the book/website directory and build the book like in the README.
[vagrant@theturingway ~]$ cd /vagrant/book/website/
[vagrant@theturingway website]$ jupyter-book build .
As the directory is shared with the host system, you will be able to see the built book on your computer and view it in your browser.
When you are done you can exit the virtual machine, and halt it. You can also destroy the virtual machine to clean up all storage associated with it.
[vagrant@theturingway ~]$ exit
$ vagrant halt
$ vagrant destroy